So, you’ve decided it’s time for a decal refresh, and you’re ready for a brand-new set of graphics. Or maybe you’re looking to replace just one decal because it’s peeling, cracked, or missing.
Once you’ve got fresh replacement graphics in hand, you’re probably itching to put them on, but there’s just one problem: you’ve gotta remove the old decals first. It can be a real pain, especially if they’ve been sitting there for a while. Weather and time can make those decals brittle, making them even tougher to remove. Trust us, though, removing the old is worth it. Skipping that crucial step will leave your new decals looking unprofessional and sloppy. And fret not, we’ve got some easy methods to make the removal process a breeze.
Keep these tips handy by printing out this downloadable PDF.
What Are Your Graphics Made Of?
Knowing what your current graphics are made of can help you decide the best way to remove them because some decals are easier to take off than others.

Placing new labels on top of old ones can look unprofessional.
Vinyl
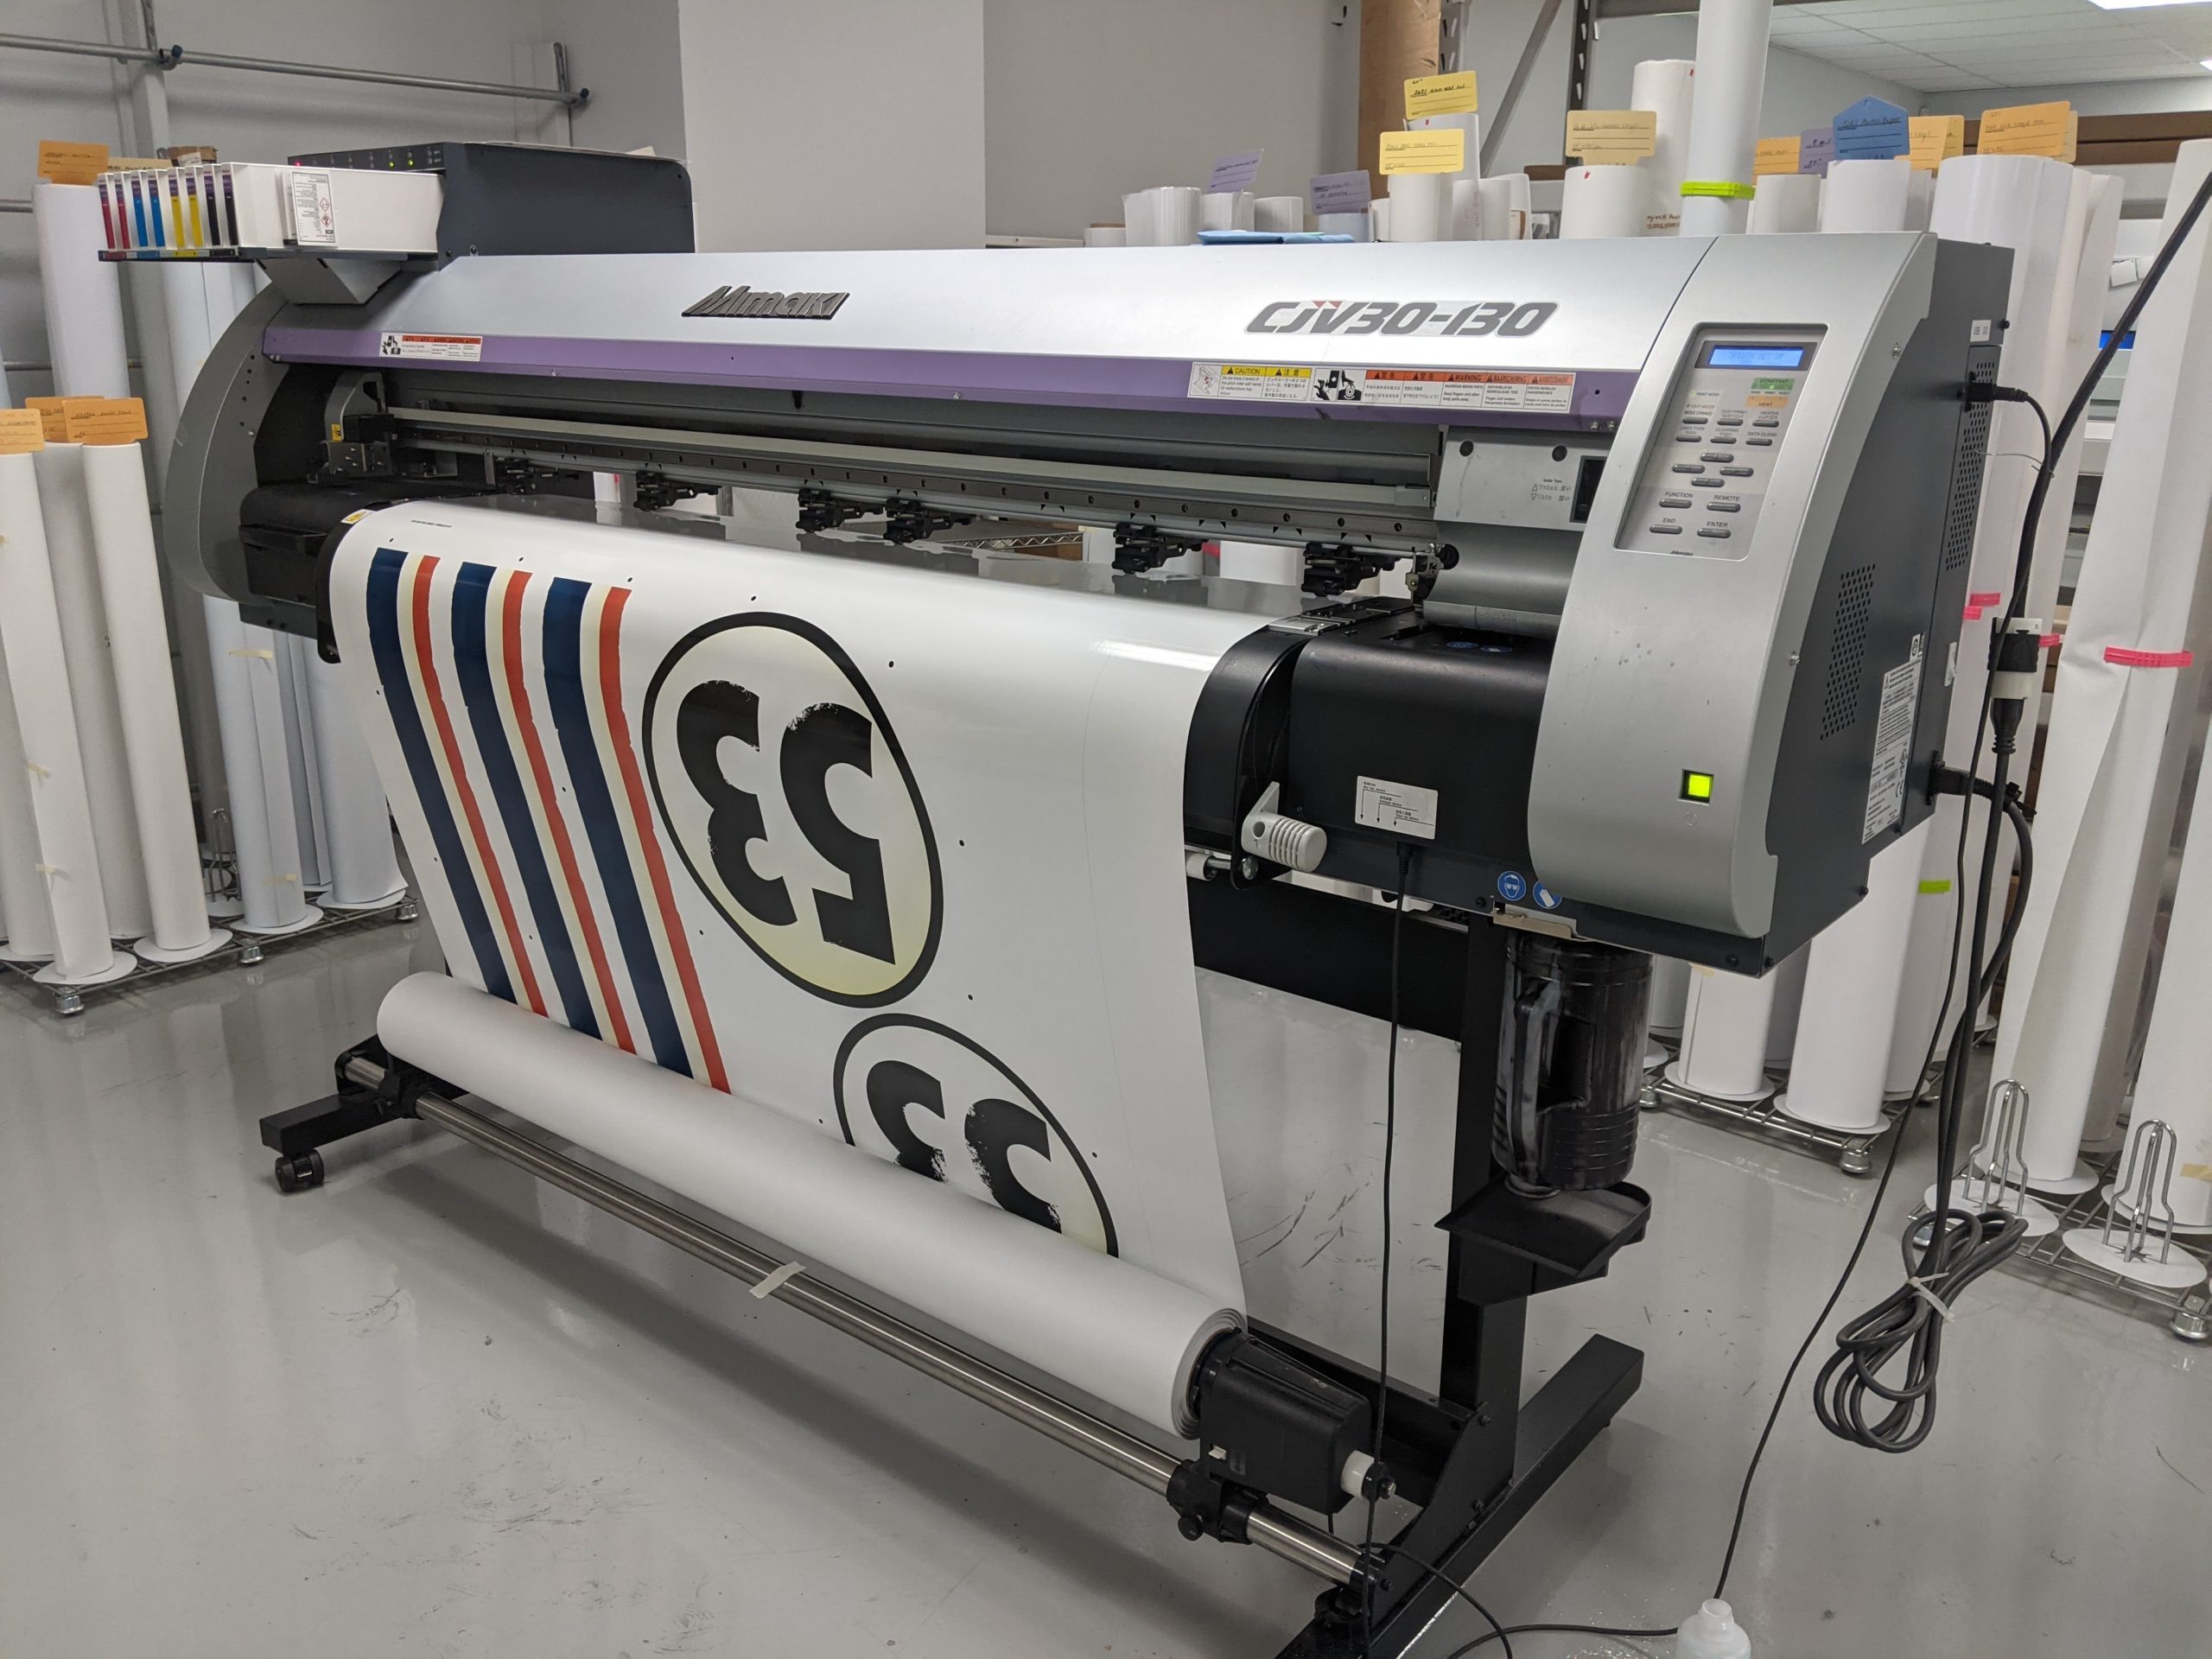
Vehicle wraps and decals, cut lettering, and warning labels are just a few pieces that are often made of vinyl. Also called “stickers,” vinyl labels are thinner than overlays and often easier to remove.
A variety of products have been created to make removing vinyl decals easy:
- Vinyl decal eraser wheel drill attachments gently buff off vinyl decals.
- Some solvents dissolve away old and baked-on vinyl decals.
- Then there’s the scraping method (see below), the tried-and-true option that can remove graphics of all types.
*Note: If your car is wrapped, do not attempt to remove the graphics yourself without thoroughly reading the material manufacturer’s removal instructions. Doing so can cause major damage to your vehicle, even though wrap vinyl is explicitly engineered for flawless removal (when done correctly).

Left: Vinyl graphics are often easier to remove than other kinds of decals. Right: Vinyl decals are commonly used on RVs and trailers.
Polycarb and Polyester
Most control panel overlays are printed on thicker plastics such as polycarbonate and polyester films. Polycarb decals can be three times thicker than vinyl decals, and they have a thicker and more aggressive adhesive. Decal dissolving solvents and buffer wheels will not penetrate the main surface, which means these removal tools are useless. Your only option for removal is the scraping method (see below).

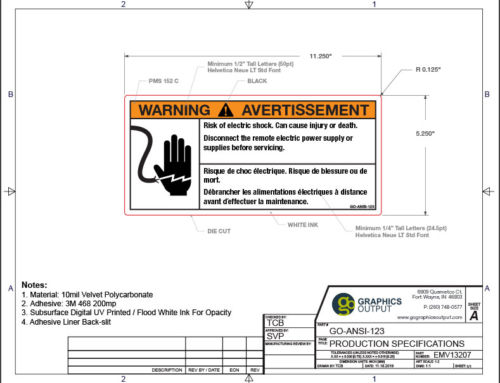
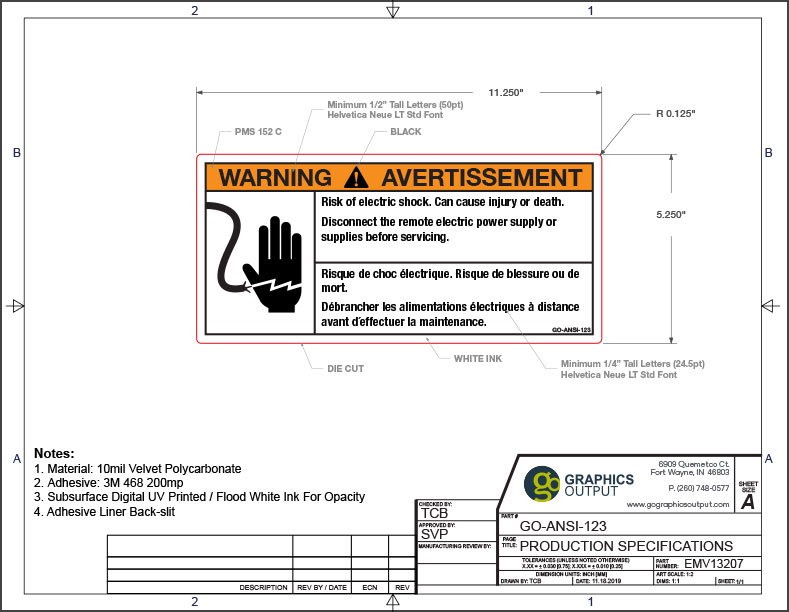
Polycarbonate overlays, as seen on an industrial control panel, are three times thicker than vinyl decals, making them more difficult to remove.
The Scraping Method
![]() Choose the right environment
Choose the right environment
The best time to remove or apply decals is when it’s warm outside. The temperature must be at least 45 degrees Fahrenheit, though 60 degrees or warmer is preferred. Ideally, humidity should be below 90%.
![]() Peel off the old graphic
Peel off the old graphic
The easiest way to remove an old decal is with a plastic squeegee or an old credit card. Wedge the squeegee or card between the decal and the surface using a consistent, slight pressure and a back-and-forth motion. When enough of the graphic has been peeled away, use your fingers to tug the remainder of the graphic off. If the decal peels away easily and without tearing, skip ahead to Step 5.
![]() Scrape off any remaining bits of decal
Scrape off any remaining bits of decal
If your decal breaks into pieces during removal, use a quality scraping razor the same way you used the squeegee or credit card. For decals that resist a razor, see Step 4.
![]() Apply heat if necessary
Apply heat if necessary
Heat guns, blow dryers, and even steam cleaners can soften adhesive. Avoid applying the heat to one spot for too long because extreme temperatures or prolonged exposure can damage surfaces and coatings. NEVER use heat to remove decals near flammable objects like a fuel tank or flammable substances.
![]() Remove any remaining adhesive residue
Remove any remaining adhesive residue
Some residue can be removed with a soapy cloth and squeegee, though polycarbonate overlays may require an adhesive removing agent like rubbing alcohol, acetone, Goo Gone, or Rapid Remover.
Keep in mind that removing agents may damage surfaces and coatings. If you are wary of chemicals or are on a budget, spread a thin layer of peanut butter on adhesive residue, leave it overnight, and wipe it off in the morning. (We’re not kidding. The fat content in peanut butter effectively dissolves adhesive.)
![]() Give the area a final wash
Give the area a final wash
Wipe the adhesive-free surface with a damp cloth, removing any excess residue or dirt, and dry the area.
For the best results, use a petroleum-based cleaner such as DuPont Prep-Sol #3919S Cleaning Solvent, Sher-Will-Clean Surface Cleaner R7K156, or an automotive-grade cleaner and wax remover.
Installing New Graphics
Most vinyl graphics can be installed using either the wet method or the dry method, while polyester and polycarbonate decals should be applied using the dry method. Both methods are covered on the Graphics Output blog.
Now, all that’s left to do is to sit back and enjoy how great your new graphics look. If you need help finding the perfect replacement graphics or decide to leave the installation to the pros, request a quote online, shoot us an email, or call us at 260-748-0577. We look forward to working with you!
